Garden Planning
Planning My 2025 Garden & Starting Seeds!
It’s February 2025, and I’m finally sitting down to plan my garden and start seeds for this growing season! This marks my sixth year with a garden and my third year starting seeds indoors. Before that, I relied on local nurseries for plants, picking up whatever looked good and giving it a shot.
A Garden Upgrade: New Boxes & A Trellis
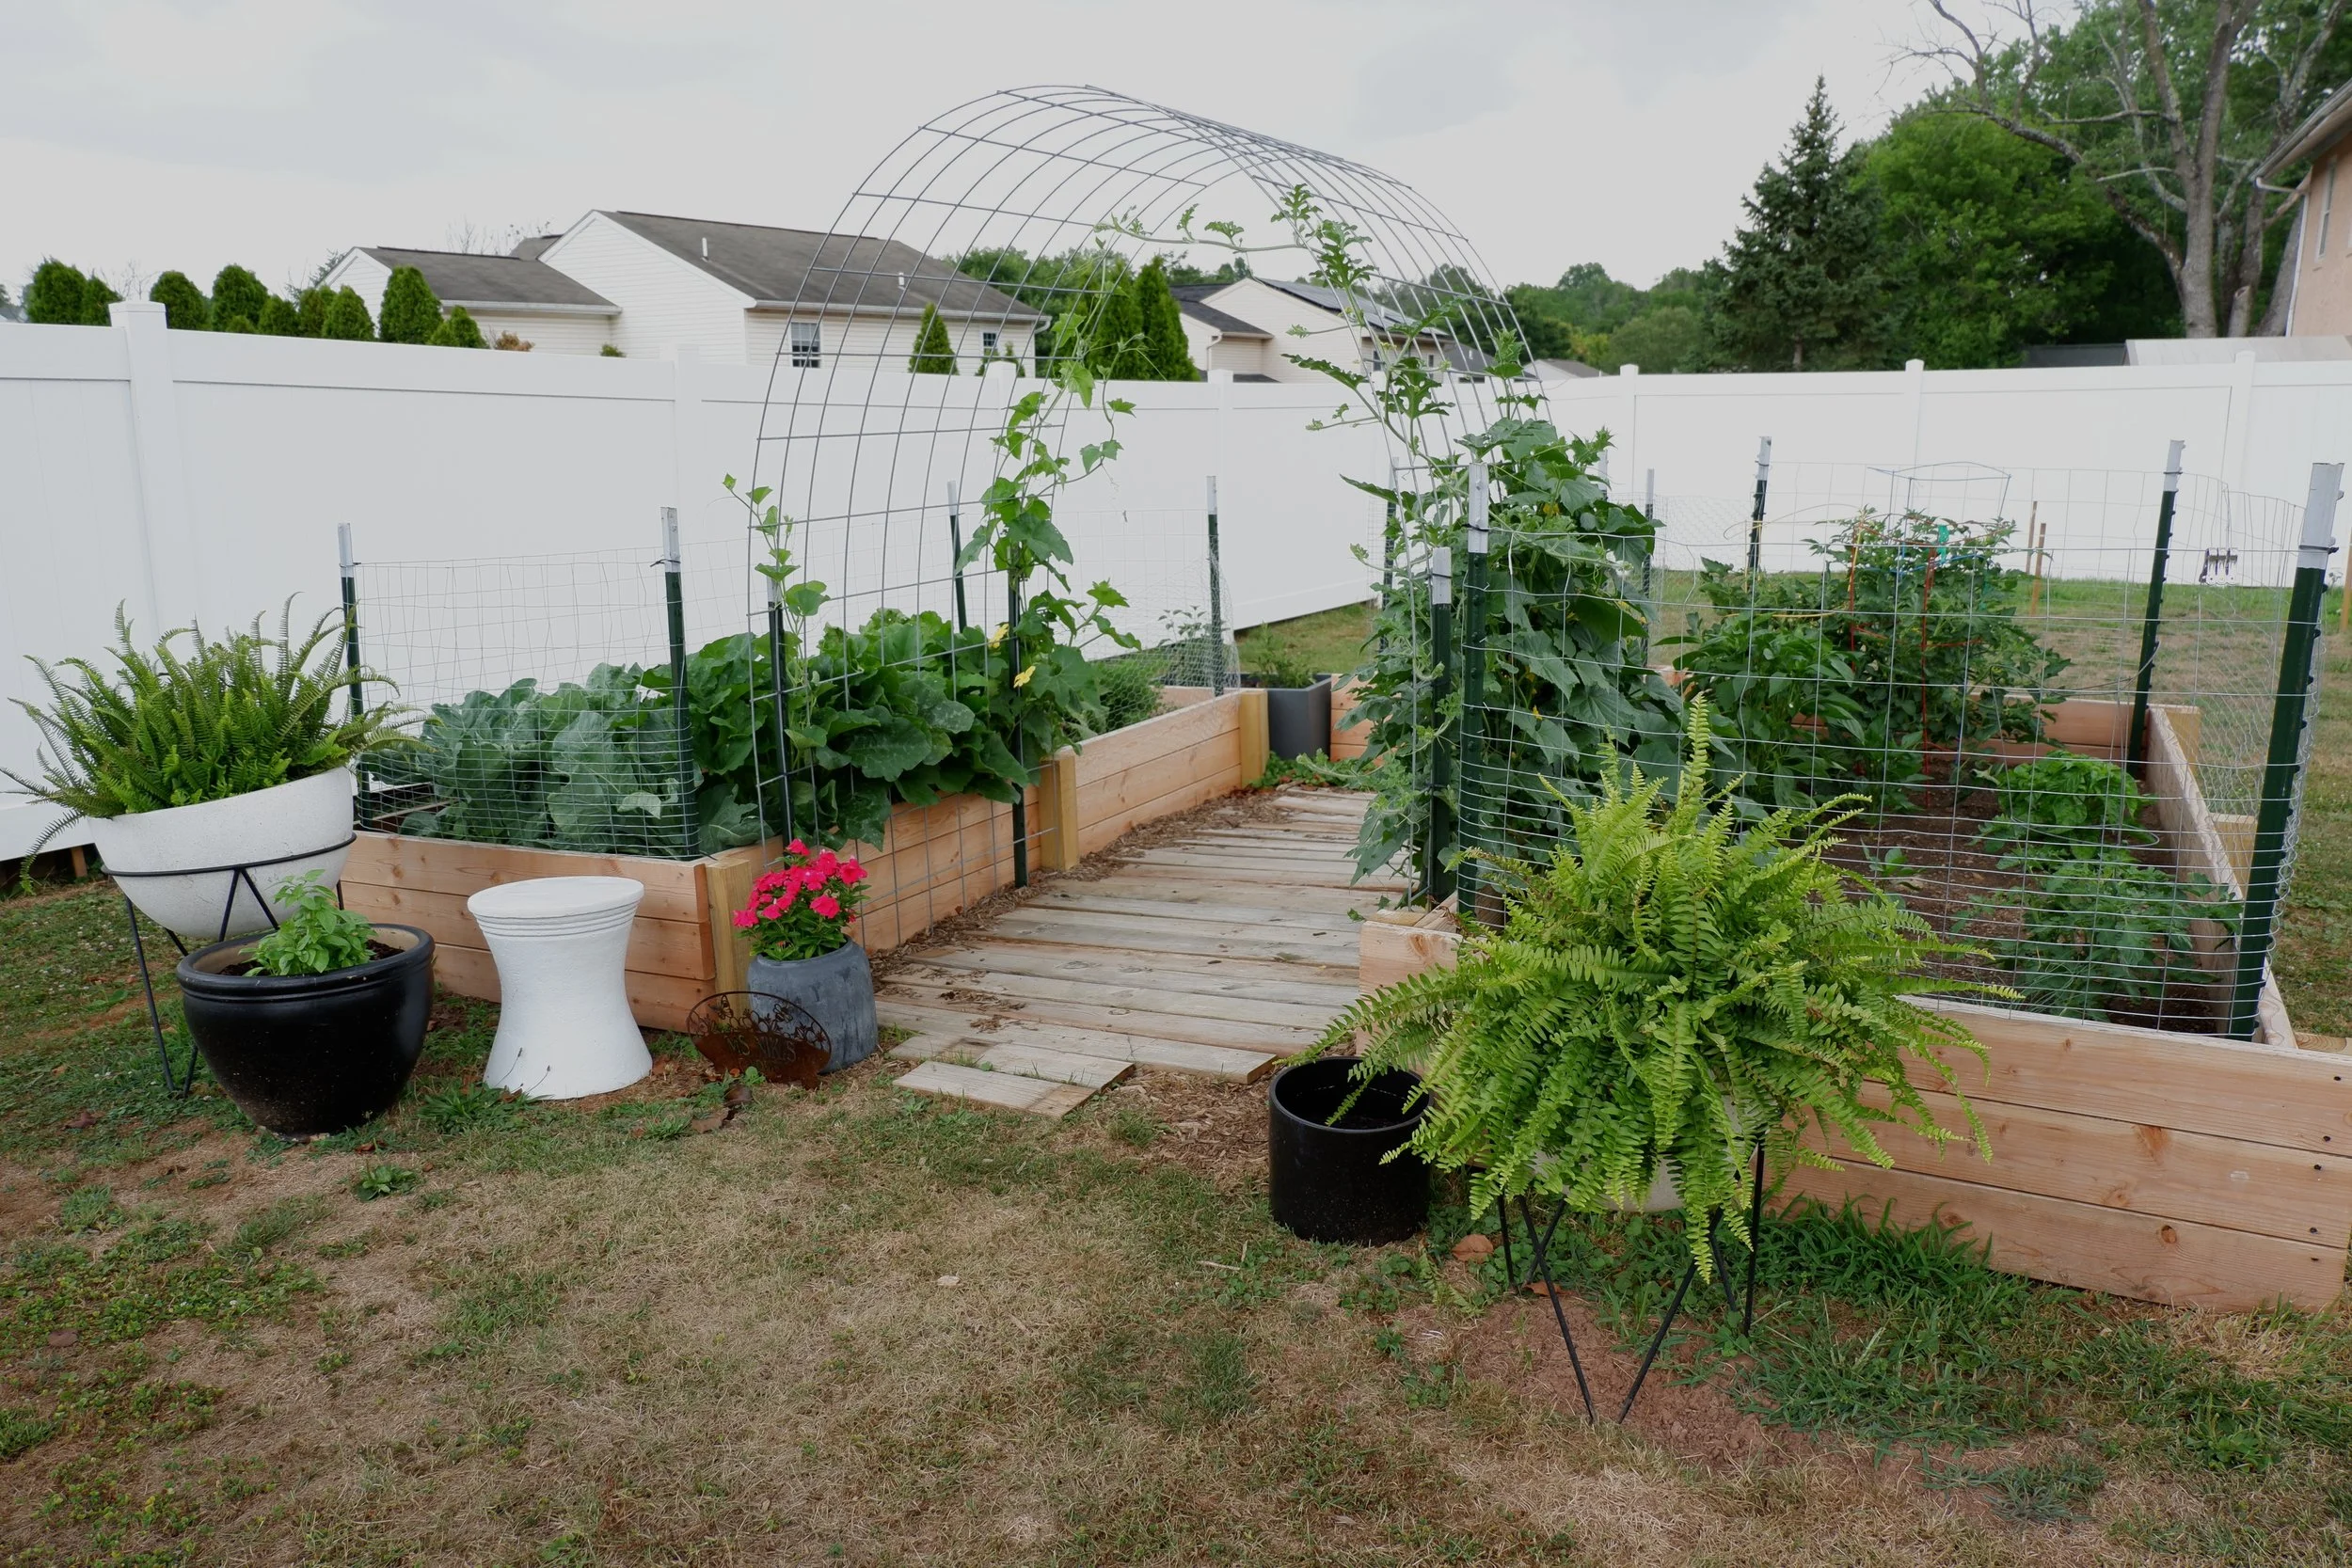
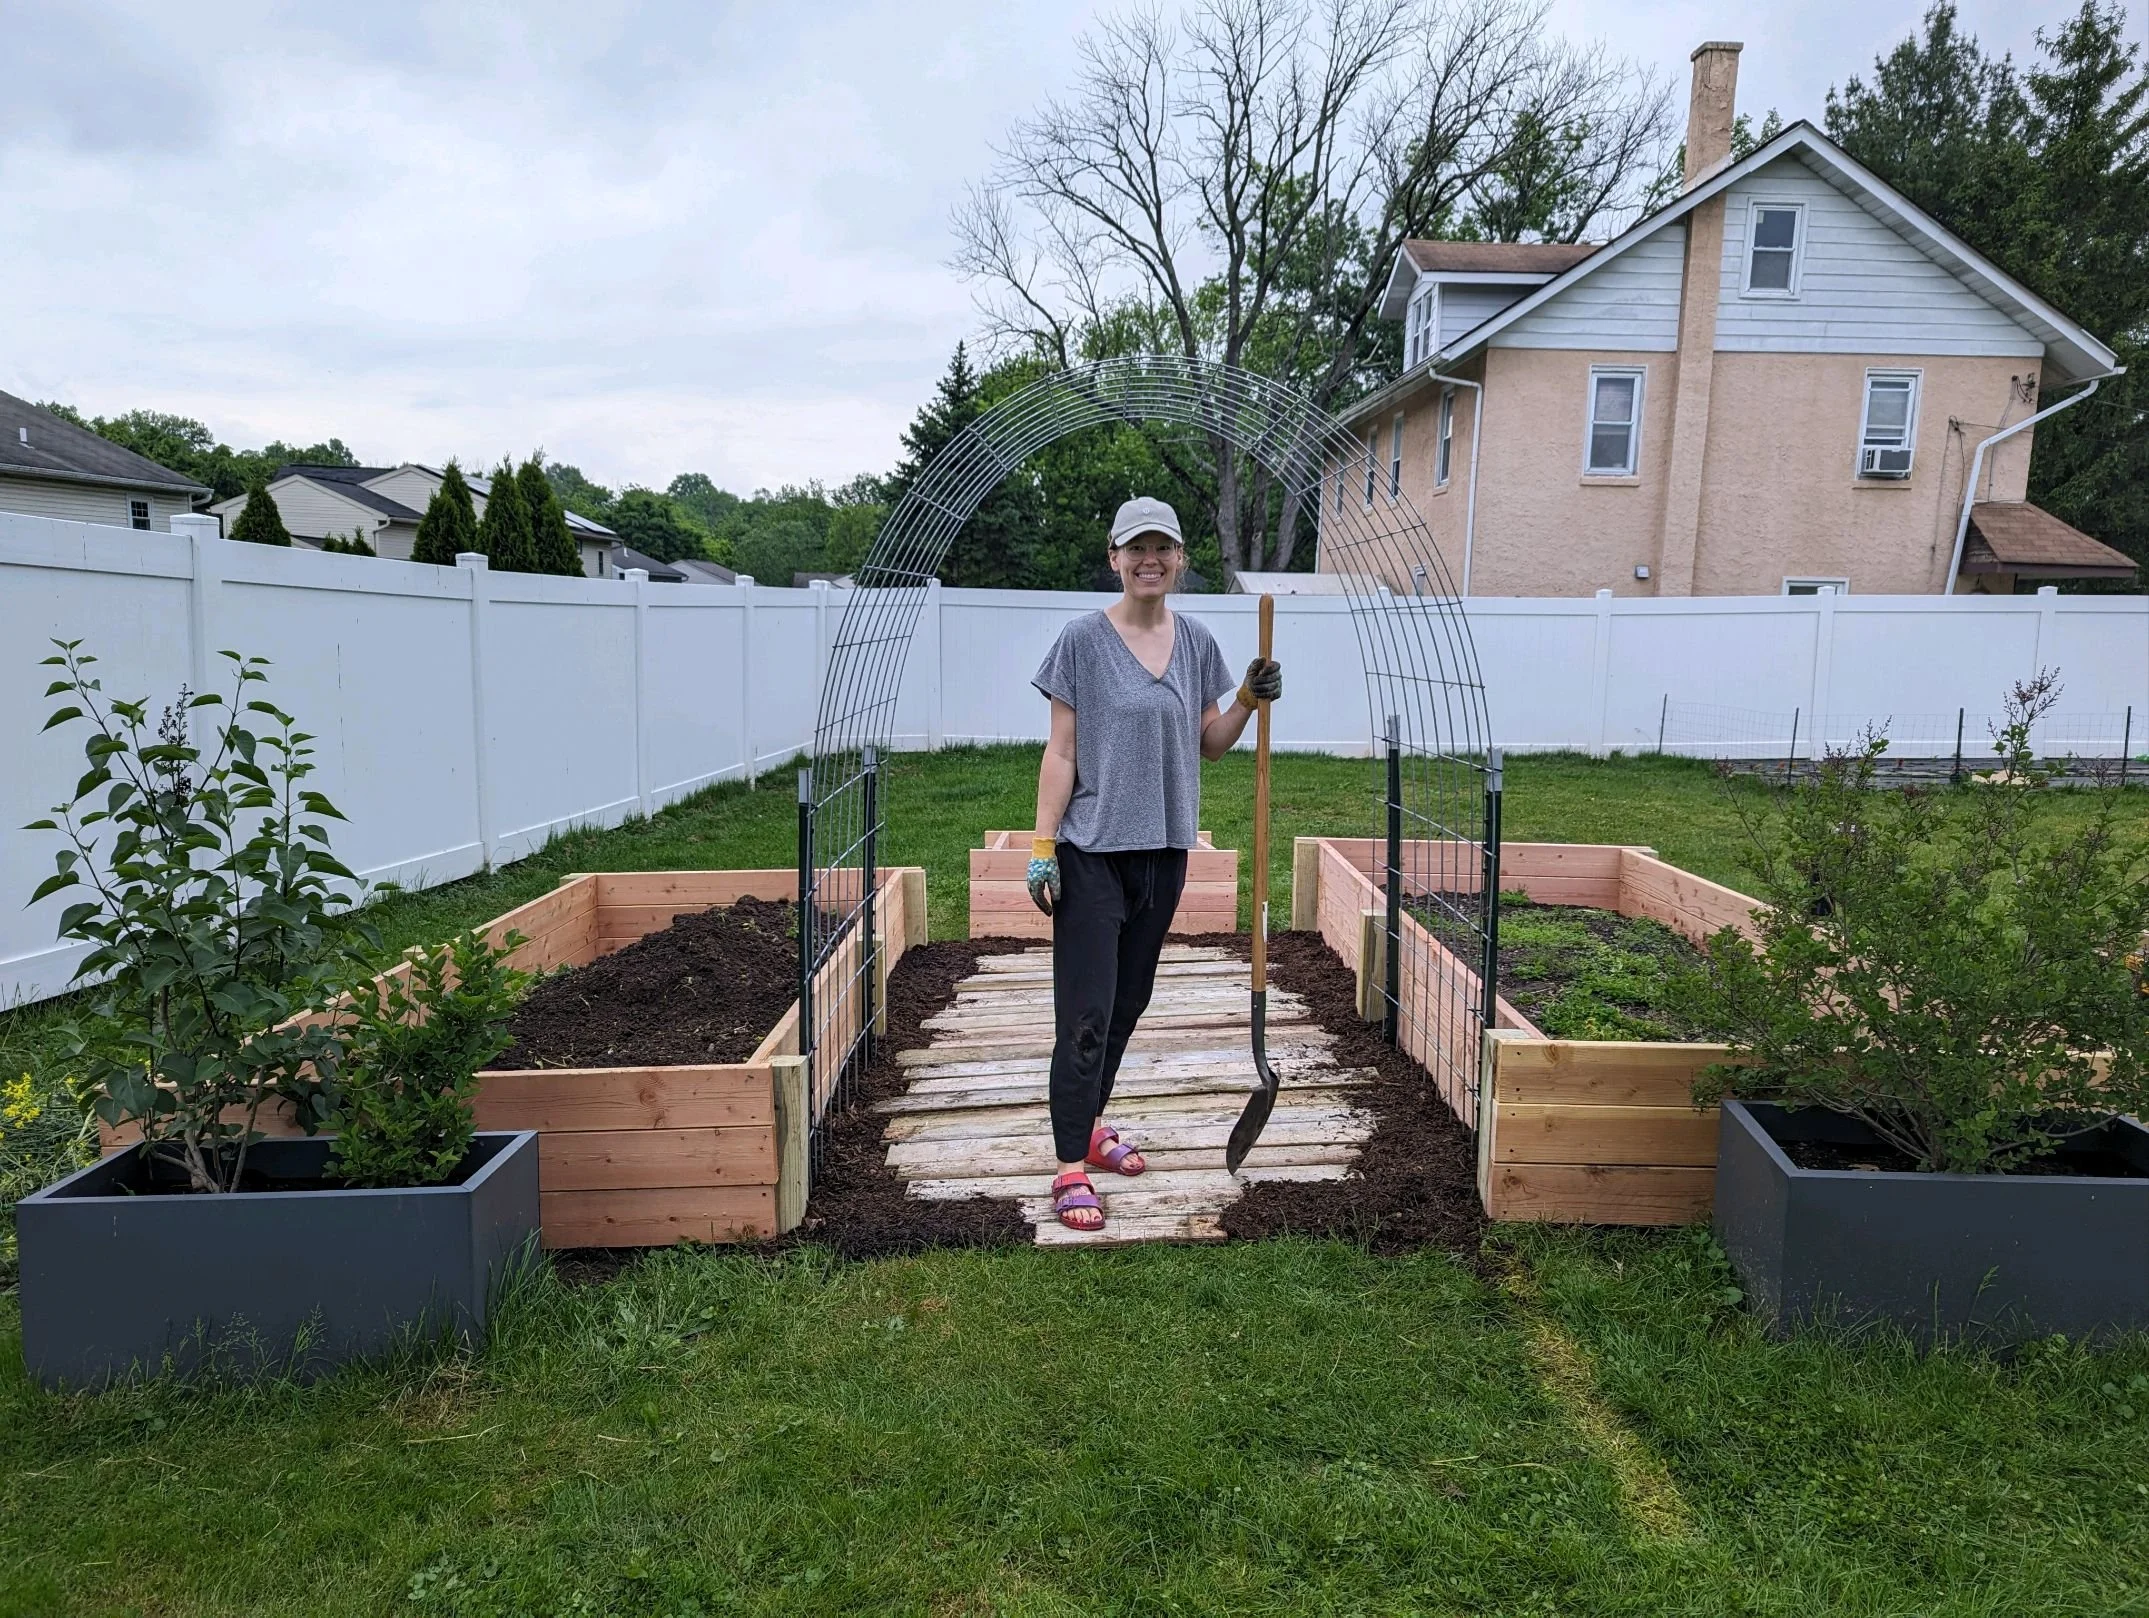
When we bought our house, it came with two garden boxes that served us well for five years. But last year, as we prepped for the season, we realized the wood was rotting—badly. What started as replacing a few boards quickly turned into a full rebuild when we saw they were deteriorating from the inside out. Instead of just replacing them, we took the opportunity to expand. We built not just two new garden boxes but three, plus a metal cattle panel trellis. I’m absolutely obsessed with how it turned out, and I’ll share some pictures because it’s that cool.


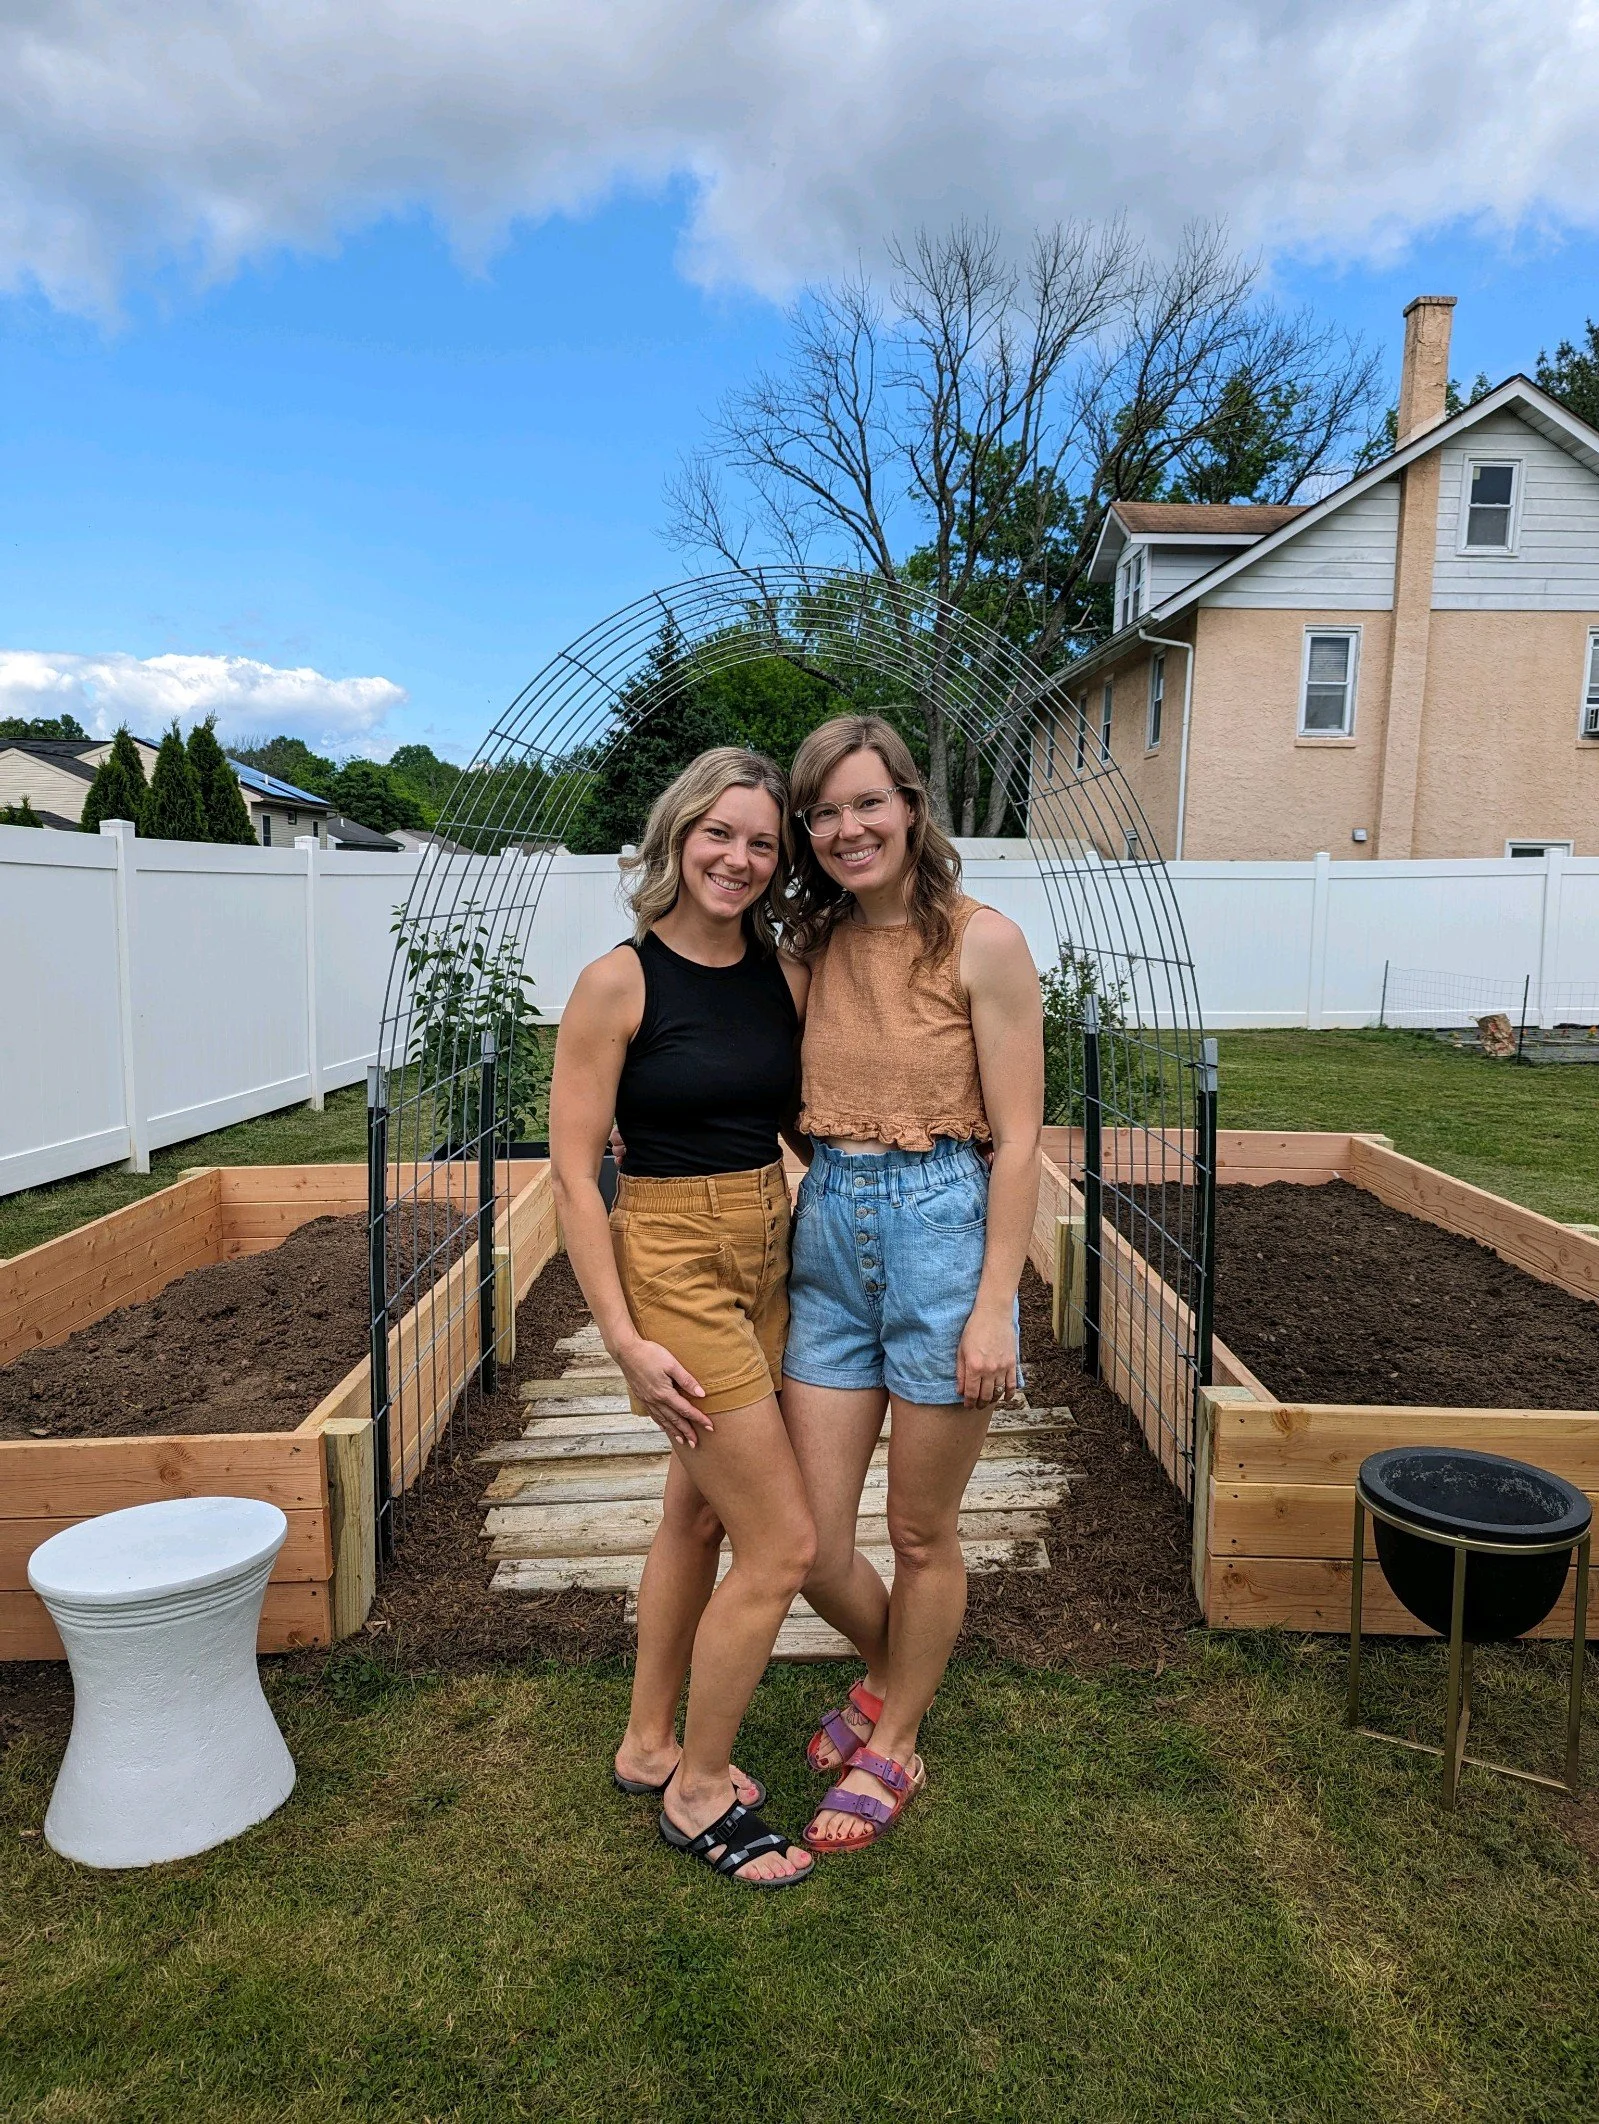
Of course, I can’t take all the credit. My husband and I built the wooden boxes, my mom helped design and execute the trellis, and my sister—who happened to be visiting from Texas—got roped into filling the boxes and laying a walkway using the old wood. It was a full family effort, and I’m incredibly proud of how it all came together.
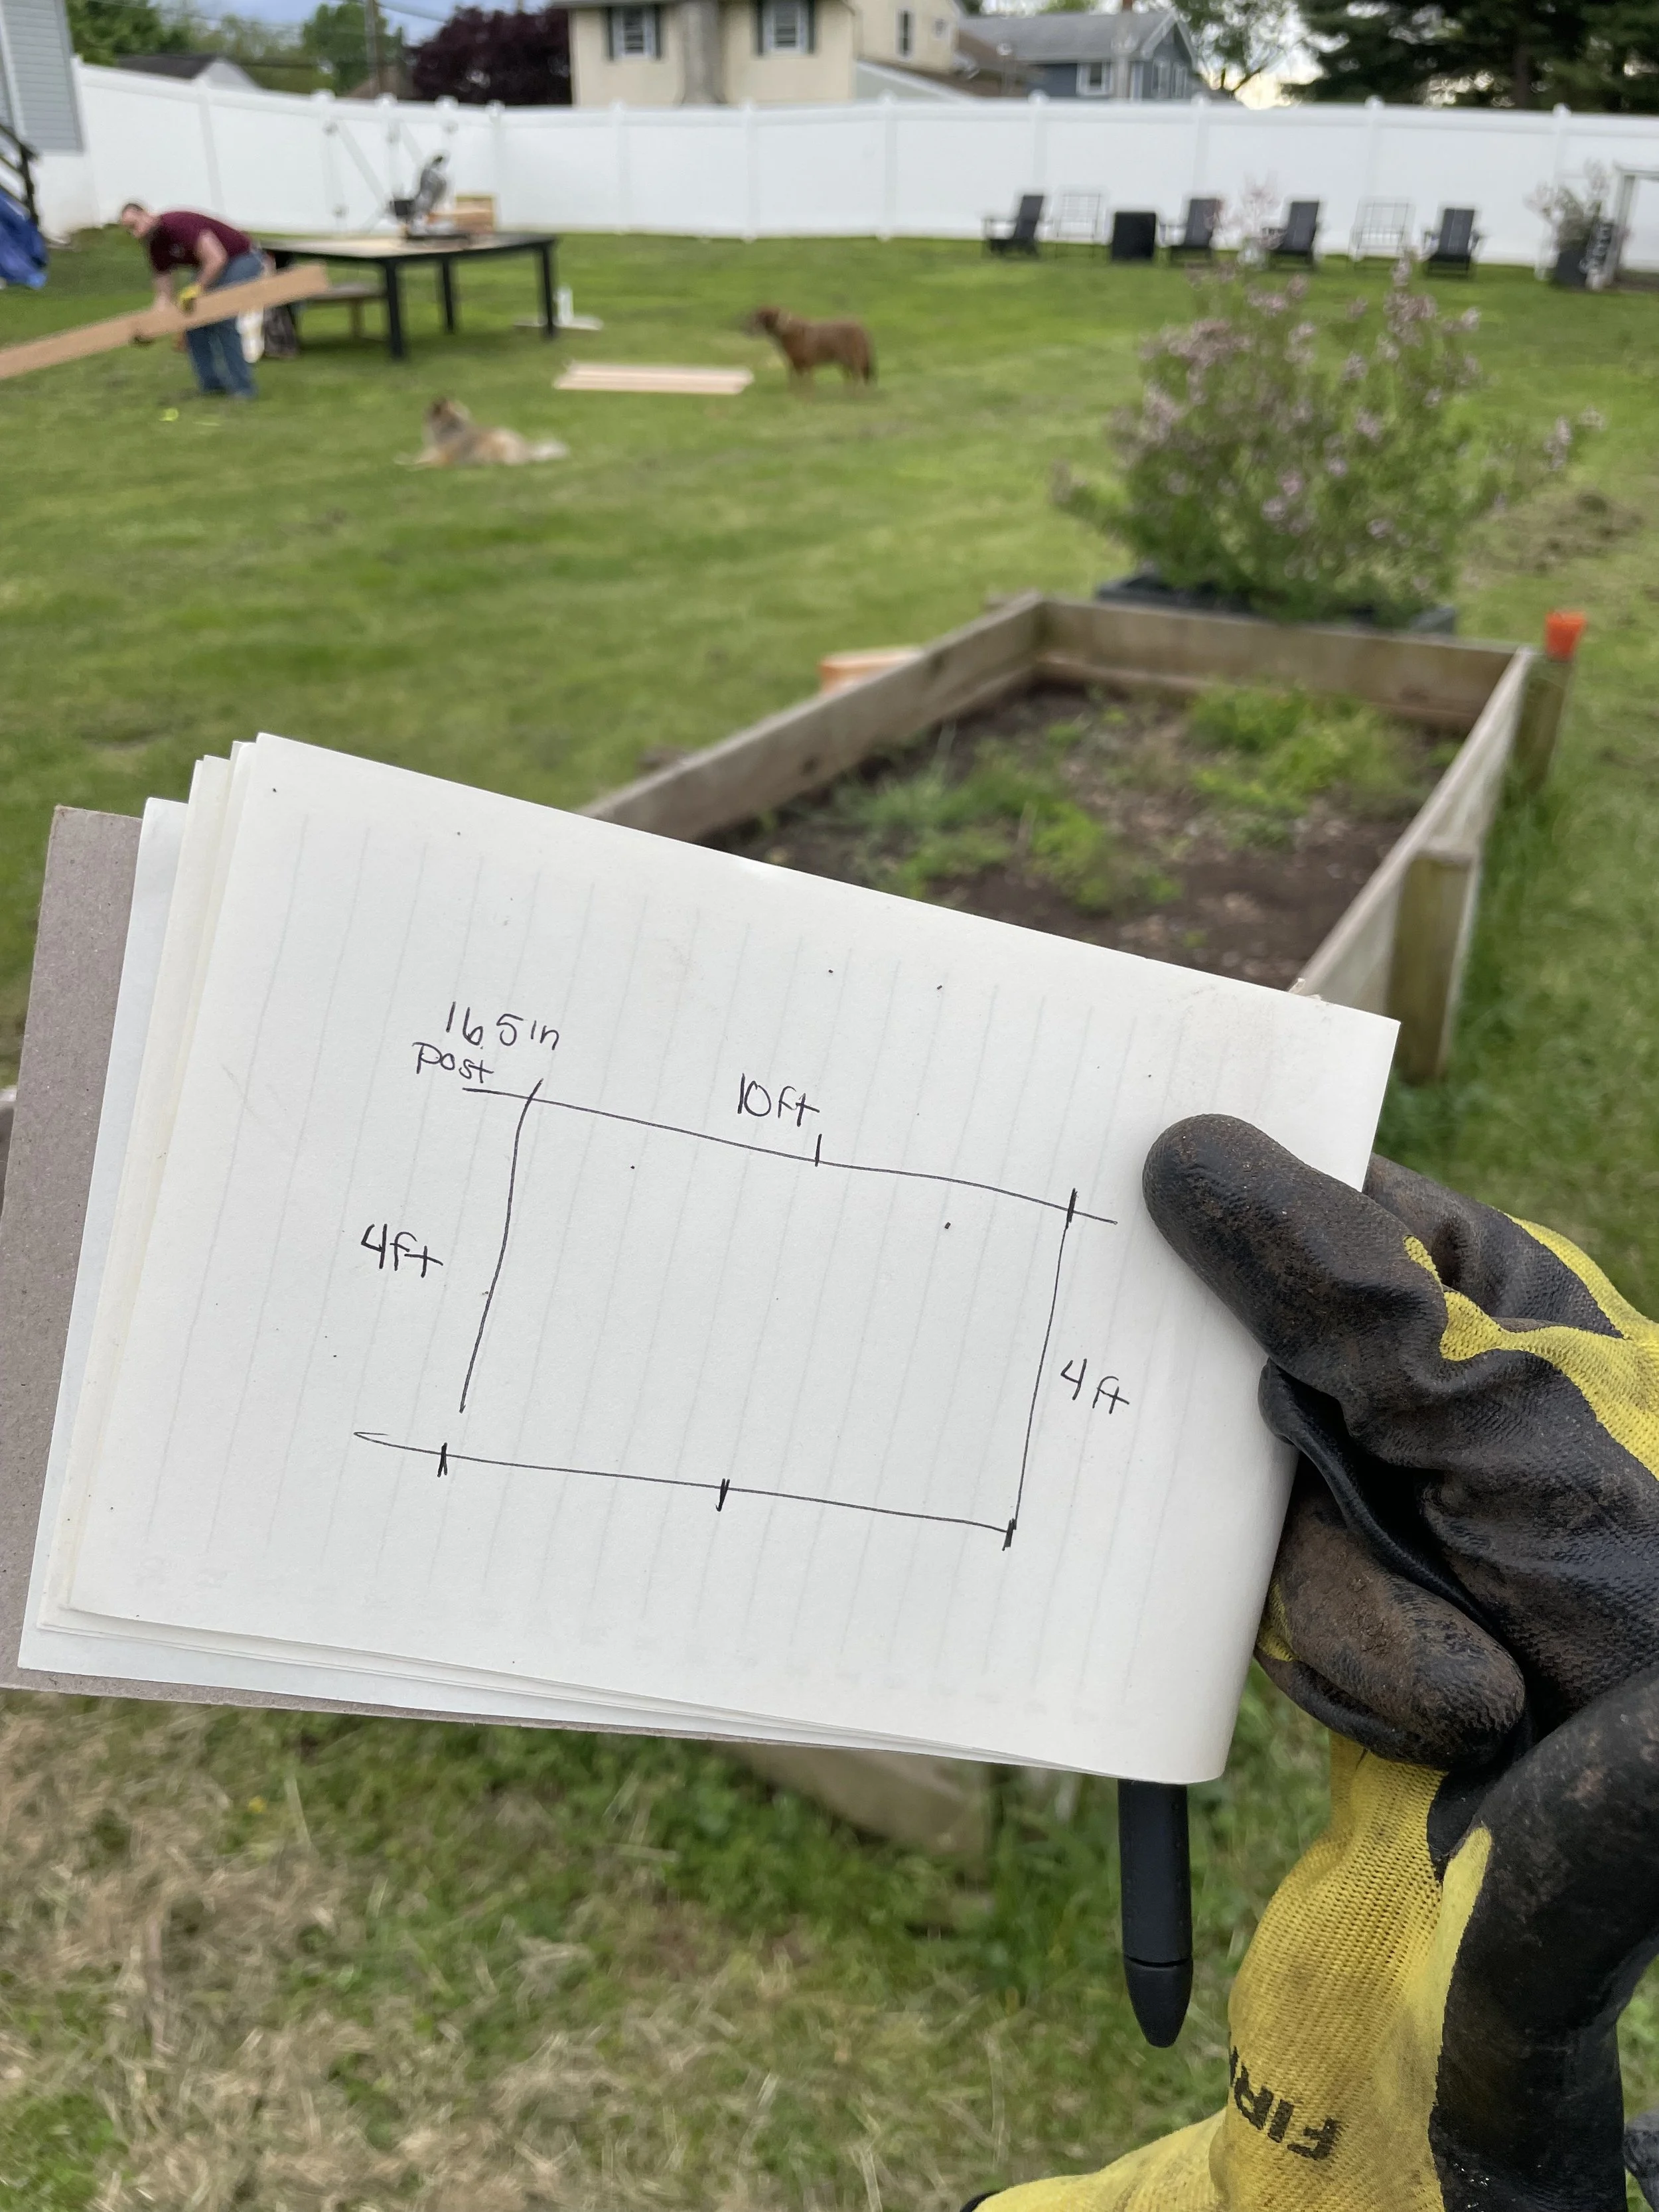
We didn’t use a plan—just measured the original boxes, noted how they were put together, and went from there. It was surprisingly simple.
The long sides consisted of (3) 2 by 6 by 10 non treated framing lumber boards. (cedar is the best option but this was more cost effective for us at the time - I have plans to stain it each year)
The posts are 4 by 4 PTs cut into 16.5 inch posts.
The short sides consisted of (3) 2 by 6 by 10 non treated framing lumber boards cut into 4 foot long pieces.
The posts were then screwed to the framing lumber from the inside with deck screws.
Here’s how we layered our raised garden beds:
1. Cardboard & Newspaper (Base Layer):
• We laid down flattened cardboard and layers of newspaper at the bottom to suppress weeds and break down over time.
2. Logs, Branches & Yard Waste:
• Next, we added old logs, branches, and sticks. This creates an airy base that helps with drainage while slowly decomposing (a mini hugelkultur method).
3. Compost & Grass Clippings:
• A layer of organic compost, grass clippings, and dried leaves went on top to introduce nutrients.
4. Topsoil & Aged Chicken Manure:
• We then added a mix of high-quality topsoil and aged manure to enrich the bed with even more nutrients.
5. Brown Craft Paper
We laid this down to to suppress weeds and break down over time.
6. Final Layer – High-Quality Garden Soil:
• The topmost layer was a mix of premium garden soil to create a soft, nutrient-rich growing environment.
This layering method helps retain moisture, improves soil structure, and keeps the garden beds thriving season after season. If you’re building or refilling raised beds, I highly recommend giving it a try!


Mapping Out the Garden

Every year, I start by sketching out my garden space on paper. I research each plant I want to grow, noting:
✔️ When to start seeds indoors
✔️ How much space each plant needs
✔️ Companion planting recommendations
Then, I plan out the layout, making sure everything fits while rotating crops to keep the soil healthy. By now, this part is second nature for my vegetable garden, but last year, I went all-in on a flower garden, which was a learning curve. It was successful, but towards the end of the season, I ran into some fungal issues and drought stress (our backyard has zeroshade). So, I’m still undecided on what I’ll do for flowers this year.
The Challenge of Gardening with Chickens & Ducks
Our backyard is big, but it’s also home to 11 chickens and three ducks. That means every single plant needs protection—otherwise, the mischievous chickens will dig them up at the first sign of boredom. I’ve been toying with the idea of a full-on cottage-style garden, but that would mean fencing off most of the area and committing a lot of time. So for now, flowers are still TBD.
Seed Starting Setup
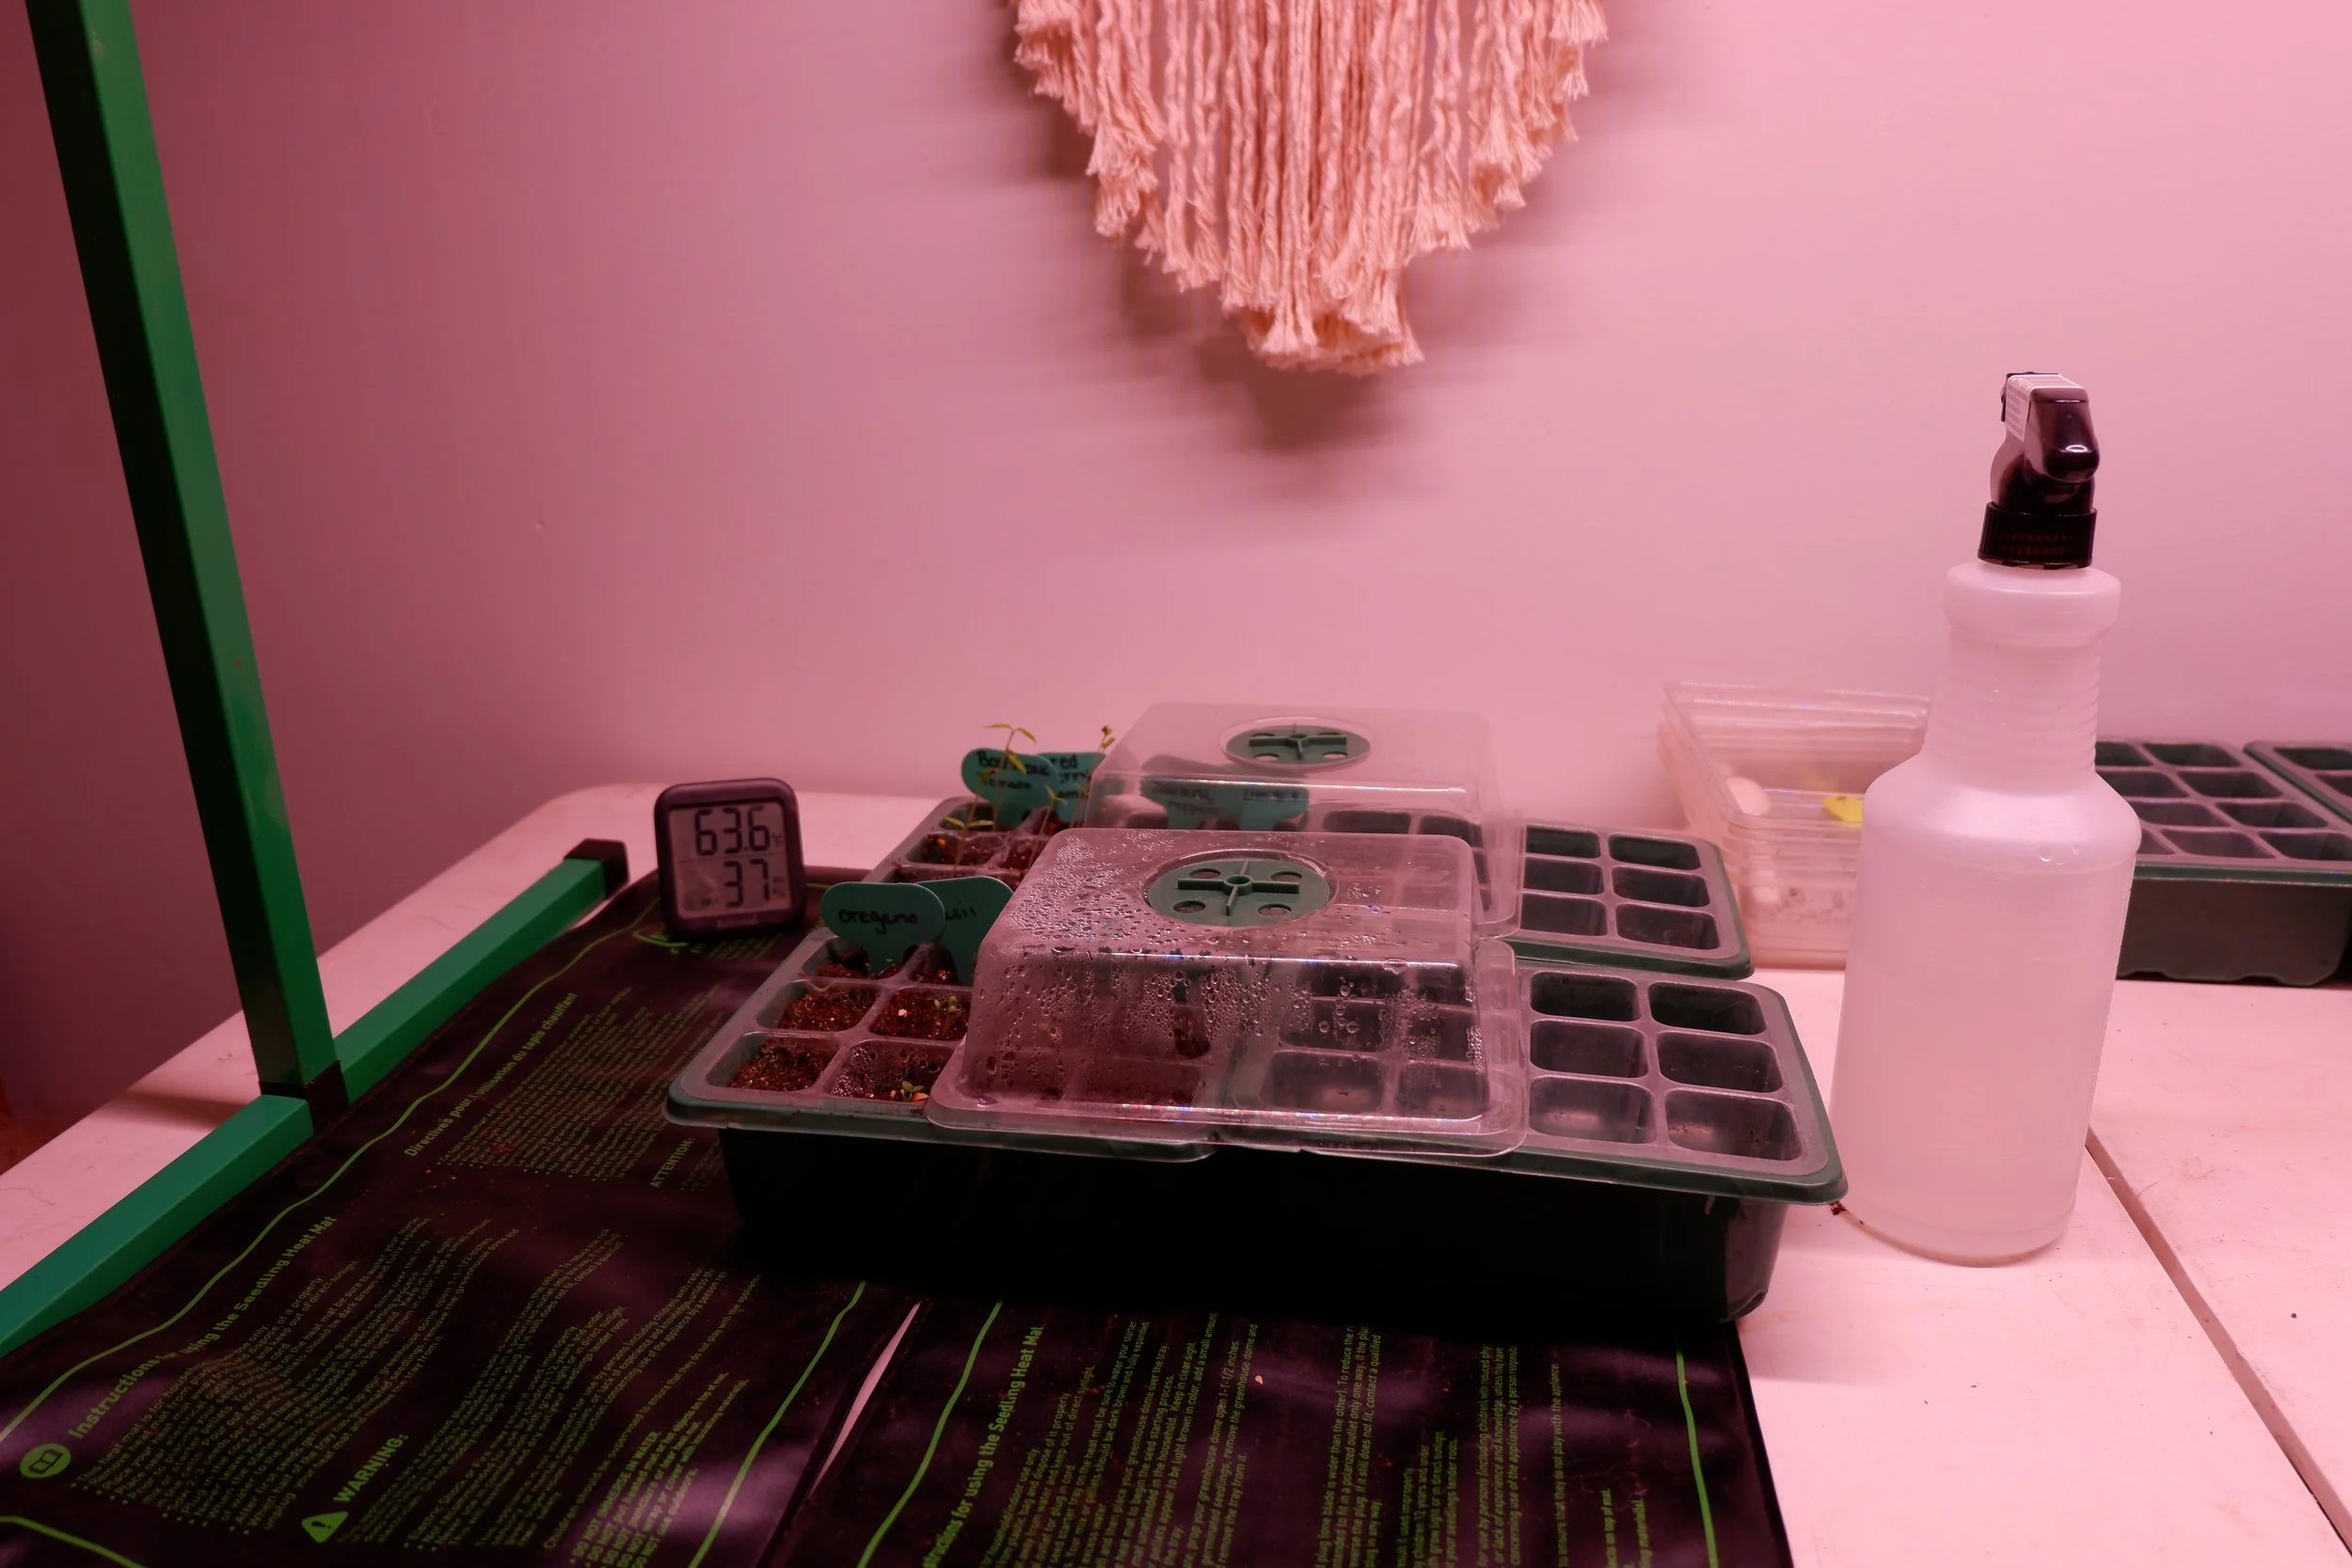
My seed-starting supplies are mostly reused year after year, and my setup is simple:
• Two folding tables in the basement
• Multiple grow lights
• Heating mats
• Plastic trays
• A giant container of seeds
Before I get started, I take inventory of my seeds, make a list of what I still need, and then head to Home Depot for seed-starting soil and any last-minute additions.
What’s Growing This Year
There are some staples I plant every year:
• Tomatoes
• Peppers & habaneros
• Carrots, broccoli & kale
• Cucumbers (always a must!)
Last year, we grew potatoes for the first time, and they were a huge success! I’d also love to grow strawberries again, but realistically, I’d need an entire box dedicated to them. In the past, we only got five strawberries a year—not worth the space.
One of my favorite successes last year was beets—we grew about 75 and pickled enough to last all winter. On the trellis, we experimented with loofah, which was fun, but pumpkins and birdhouse gourds didn’t quite work out. We might try again, but I’ll need to adjust my approach.
Finding Balance with My Busy Schedule
Once I have my supplies, I get to work:
1. Washing seed trays with dish soap and letting them dry
2. Setting up heat mats and plant lights
3. Planting seeds in quality soil according to the packets
I’m not one to do things halfway, so this is usually a pretty intensive process. If I’m being honest, I’m a little nervous about how I’ll manage it this year. My work hours are longer, I’ve been hitting the gym daily, and meal prepping has become a priority. Finding a balance between seed maintenance, watering, and transplanting without sacrificing my health routines is going to be key.
The Plan: Mother’s Day Transplanting
I’ll care for the seedlings indoors until Mother’s Day, replanting as needed. Then, come Mother’s Day weekend, I’ll move everything outside—unless it’s a flower that needs special timing. Last year, we didn’t get things in the ground until after Memorial Day because of the garden rebuild. This year, I’m hoping to be ahead of schedule and get an earlier start on the season.
Can’t wait to see how this year’s garden turns out! Stay tuned for updates—and if you have any garden planning tips or favorite plants to grow, send me a message!